HOW TO CREATE & TARGET AN IOS 14.5+ AUDIENCE ON META
In our blog post we will explain and give examples and tips on how we can aim for target users / target audiences with iOS 14.5 and / or later, on the Meta platform (formerly Facebook, Inc).
Our scenario/ case:
The case study that we will develop as an example is as follows:
We are Authorised Resellers of Apple products, and we need to promote the Apple Watch xModel, a new Apple Smartwatch product /series to everyone who already owns and operates Apple products, such as Apple iPhone, operating system iOS 14.5 or later.
What tools and material would – was it good to – use?
Meta Platform Tools:
- META Custom Audiences
- META Pixel (optional)
Content & Creative | Content & Creatives (e.g., Videos, Graphics, MoGraph):
- Product video (if there is official promotional material to use it would be better)
*The total length of the video should be 15” seconds, alternatively, a 5” second video would be a pretty good alternative.
STEP 1 [Campaign Level]
CHOOSE A CAMPAIGN GOAL.
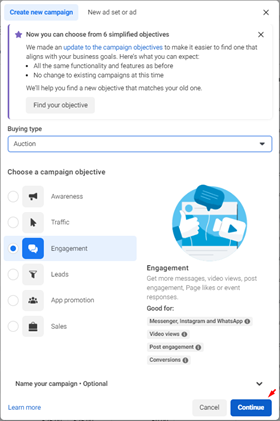
Go to your ad account, within Meta Business Manager, and select “Engagement” as the main campaign objective and then the option “auction” as the buying type.
Then, press the “continue” button in the lower right corner to save your selections and move to the next layer of your campaign’s structure, the Ad Set (where you will find and target your ideal desired target audience – users with iOS 14.5 and/or later on their devices).
*Tips & Advices :
Activate the Advantage Campaign Budget option (also known as Campaign Budget Optimization – CBO) to allow you to compare and test (2) two or more target audiences between (2) two or more ad sets.
CBO will spread your budget among your ad sets to get more results depending on your optimization choices and bid strategy.

STEP 2 [Ad Sets Level]
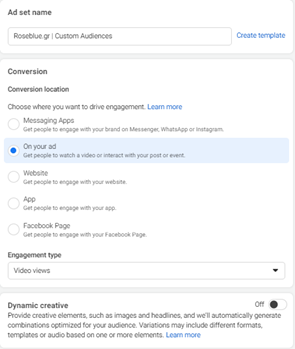
SELECT LOCATION & CONVERSION TYPE (CONVERSION)
In the Conversion location section, select the “In your ad” option. This will help Meta/Facebook’s algorithm identify and determine where you would like to drive and record your conversion. Then, proceed to the “Interaction type” or “Engagement type” and select the type “Video Views”, i.e., “Video Views” type.
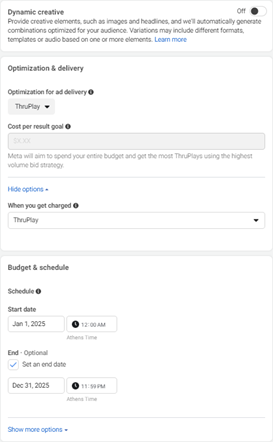
CHOICE OF OPTIMIZATION & DELIVERY METHOD | OPTIMIZATION & DELIVERY METHOD
As we are going to target and eventually “track” users using devices with iOS 14.5 or later, we will have to choose “ThruPlay” as the main delivery and optimization method, also known as the “delivery and optimization method”.
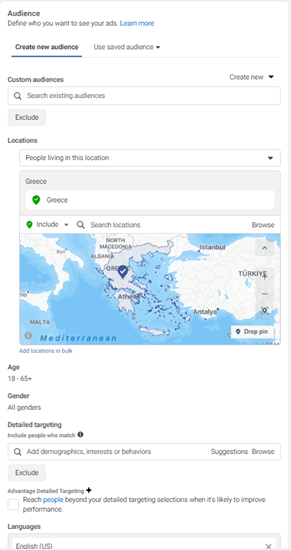
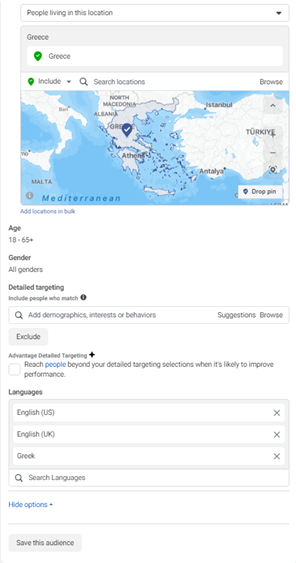
DETERMINE WHO YOU WANT TO SEE YOUR ADS | DEFINE WHO YOU WANT TO SEE YOUR ADS
The next step, within ad sets, is to define who, where and why (interests) will see our ad. In this section, you can define your target audience by location, gender, age, language and many other options that you think best suits the ideal persona of your target group.
In our case, we will not select any interest (for example, users who have expressed interest or liked pages related to mobile phones), as we are going to track, all users with iOS 14.5 or later on their Apple devices.
If you think a further segmentation is necessary in your audience, for example those who simultaneously own an iPhone 14 Pro mobile phone, you can proceed with it.
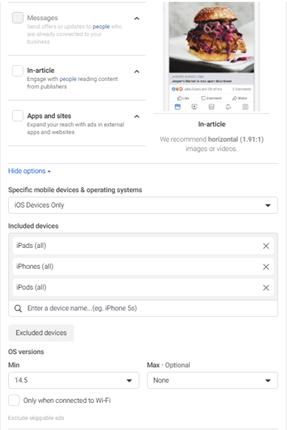
DEFINITION OF SPECIFIC MOBILE DEVICES & OPERATING SYSTEMS | DEFINE SPECIFIC MOBILE DEVICES & OPERATING SYSTEMS
This is the main section, at the level of our ad set, where we will define our audience.
As we have already said, our main audience is any user who has a device that is running iOS 14.5 or later.
As shown in the screenshot below, in the section “specific mobile devices and operating system” we have already selected “iOS devices only”, that is in the section “specific mobile devices & operating system”. As well as “included devices”, therefore “included devices”, we have selected all possible and available mobile devices.
Then, as a last step, proceed to select “operating system versions” or as it appears in the English version of business manager “OS versions” and select any device running iOS 14.5 or later.
This is the basic/main option within the ad set that will help us target exactly our desired target audience.
After that, we have completed the most basic steps in order to define and target our audience.
*Tips & Advices:
- If you want to have full control over where your ad will appear, don’t forget to select the “Limited Inventory” or “Limited Inventory” option in the “Inventory Filter” section at ad set level (both for Facebook in-stream videos, Facebook Instant Articles, Facebook Reels, as well as Meta’s Audience Network).
- As our main goal is to target and build our audience in iOS 14.5+, remember that you should exclude “Audience Network” as a placement. While it’s a great way to expand and grow your audience to reach and improve your brand awareness, users who have watched your video on “Audience Network” will ultimately not be counted and will not be shown to our final audience.
STEP 3 | STEP 3 [ad level]
Finally, the creative part of our ad creative. As we have already mentioned in the first stage (step #1), we will need a product video of 15” seconds or alternatively, a 5” second video.
So, with the material in our hands, we started setting up our ad. We name our ad with a unique and easily recognizable ad name, select our Facebook Page and Instagram Business Account as well as the Create Ad option in the Ad Setup field.
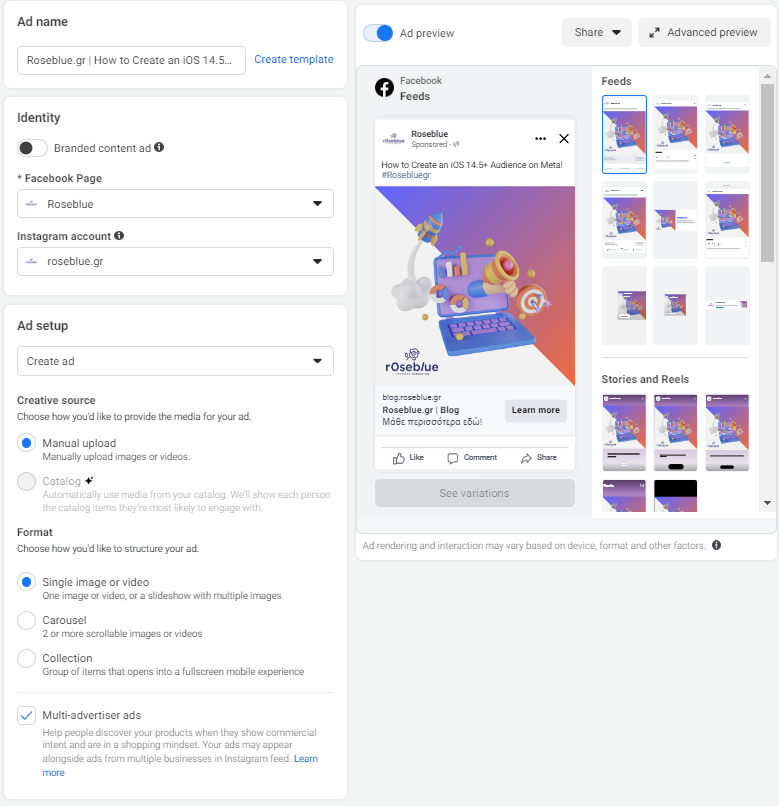
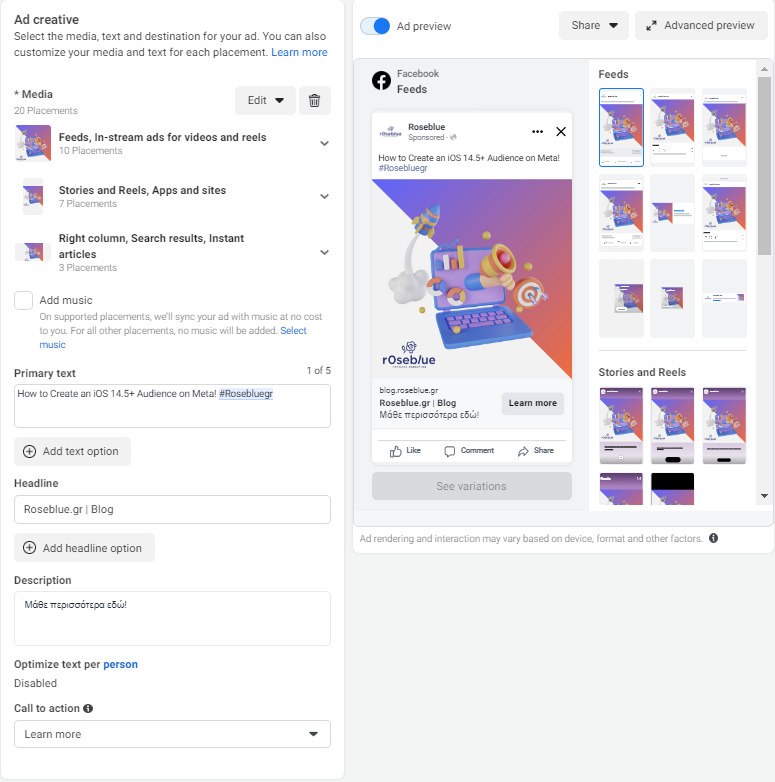
Continuing, we select and upload the video we have, we create and shape the text (copy) of our advertising including titles, descriptions and the appropriate CTA Button, indicatively in our case the “Learn More”.
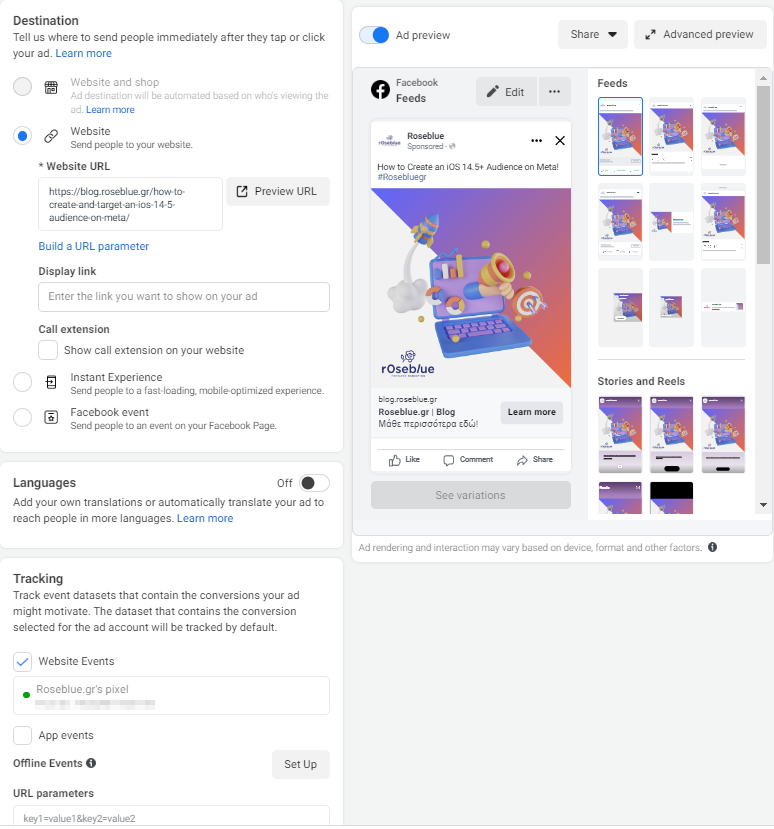
While we continue and complete the Setup of our ad with the selection of the “Destination” that we want our Ad to have (i.e., where the user will be led by clicking on our advertising message), for example www.roseblue.gr
Finally, in the Tracking section we select and activate our Meta Pixel so that we can record and group all users who have been transferred to the desired landing page (e.g., the home page of our e-shop or website) from the specific campaign / advertising campaign even if our main goal is not that (website visitors tracking).
*Tips & Advices:
- For the best user experience, you can use different art dimensions per placement. For example, a safe option is 1080×1080 for all placements while in Stories 1080×1920 is indicated so that the end user receives the best experience (mobile version / full screen).
- For the most efficient recording / monitoring of users who have visited the e-shop, the website or any other landing page we have chosen, the use of UTMs parameters is considered necessary. This is because in the long run you will be able to handle these users – who have entered purely and only from this promotion for the creation of other, complementary societies such as website visitors, lookalike audiences, etc.
STEP 4 | STEP 4 [Create Custom Audiences]
CREATING A TARGET AUDIENCE
After we have already completed all the above at the campaign setup level and our advertising campaign is active, it’s time to create our desired target audience.
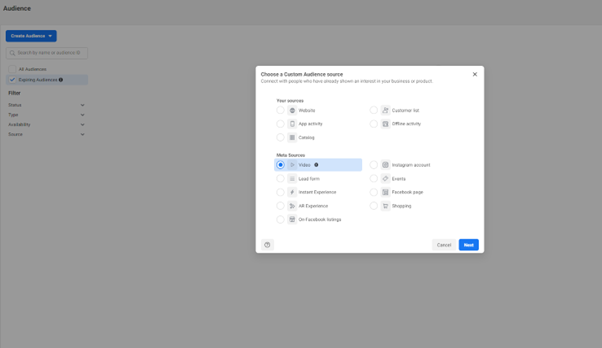
For this process, you will need to go to the create audiences tab, through the Business Manager by clicking on the burger icon in the upper right corner of your BM. From there, select “Audiences” to go to the corresponding tool of the platform as reflected in the screenshots below.
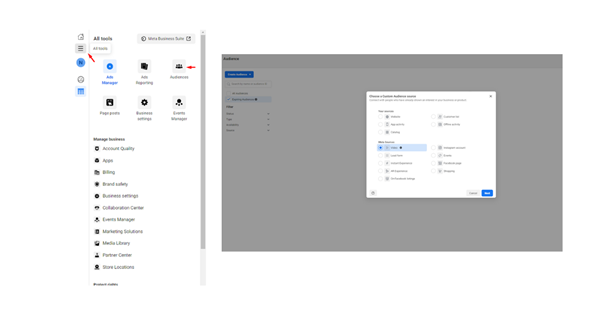
Then select the “Create Audience” option and select the “Video” option as the “Video” option (Meta Source). Confirm your choice by pressing “Next” at the bottom left of the window.
After you are transferred to the next page, select the video you have used in your campaign as well as the minimum duration of the video already watched by your user / target audience.
Indicatively, in our case, we have selected the users who have seen at least the (3″) first three seconds of our promotional video (total duration (15″)) of fifteen seconds.
At the same time, select the time period from which you want the user to be tracked and saved in your custom audience. We have chosen to keep it in our custom audience (retention) for 365 days from the moment you watch at least the (3″) first three seconds of our video.
The 365 days is the maximum duration offered by the Meta / Facebook platform for “monitoring” and “recording” target audiences based on their interaction with a video (on Facebook / Meta Tracking).
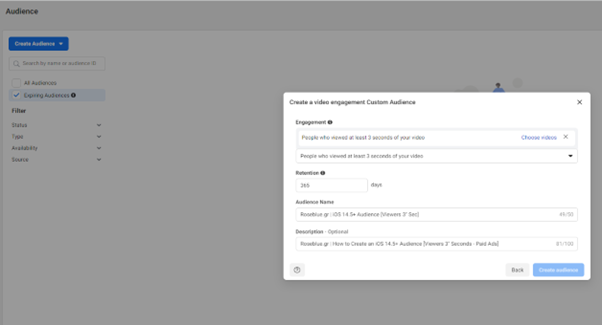
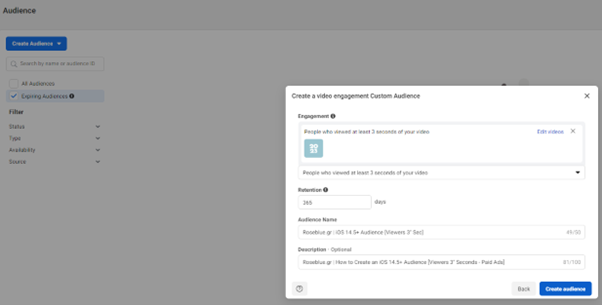
Finally, name your audience with a simple, short and apt name so that you can find it and refer to it anytime you deem necessary in the future.
Confirm the process, and therefore the creation of your target audience by clicking on the “Create Audience” button at the bottom right of the window and you are good to go!
Your audience has been successfully created and is ready to use whenever you need it!
*Tips & Advices:
- When creating your audience, based on the time duration of the video that the user has completed, you can choose among others other options such as 25% of the total video or the entire video (ThruPlay) if the total duration of the video is up to (15″) fifteen seconds.
- To be able to track a user who has seen less than 3′ seconds of your promotional video, use a video of a total duration of 5′ seconds and choose the 25% option. With this method, you will be able to track any user who has completed at least the first 1.25” seconds of the total duration of the video.
- When you finish creating your audience and after it’s ready to use, use it as an exclusion in your Ad Set. By exclude, the video will no longer be shown to those who have seen at least the x-time duration you have chosen (for example the first 1.25″ seconds) and so by demonstrating it to new users from our target audience, your total audience will grow continuously and gradually.
- The above tip (tip #3) includes a possible increase in the cost per result, as the target audience decreases, and your campaign impressions increase proportionally.
Stay up to date with the latest Digital News!
CONTACT US